Showing posts with label before and after. Show all posts

Saturday, August 25

Easy Chair Makeover {and another before-and-after picture!}

Hi, everybody!

Well, I have had a glimpse this week of what motherhood might be like for me.  

Atticus got sick again twice this week.  We took her to the vet today and they are treating her with probiotics and antihistamines, in case she is allergic to something.  But they say her behavior appears to be epileptic.  Oye.

So, we are hoping that it is just a GI issue and that we can find the trigger!  

But I have, shall we say, not been handling it well.  I really don't know how I am going to handle it when my babies get sick or hurt.  I'm banking on the fact that my maternal instincts will make me stronger.

Here's hoping.

But on another note...

I wanted to share with you a fun project I finished last week!

I actually "rescued" these chairs from an old building at my church before it was torn down last year.


When Brian and I decided to make the second bedroom an office, I liked the idea of making it a couple's office.  

Two desks, one "male" and one "female," but I thought it would be cute if we had matching chairs.

So, I thought of these poor little abandoned and abused chairs.

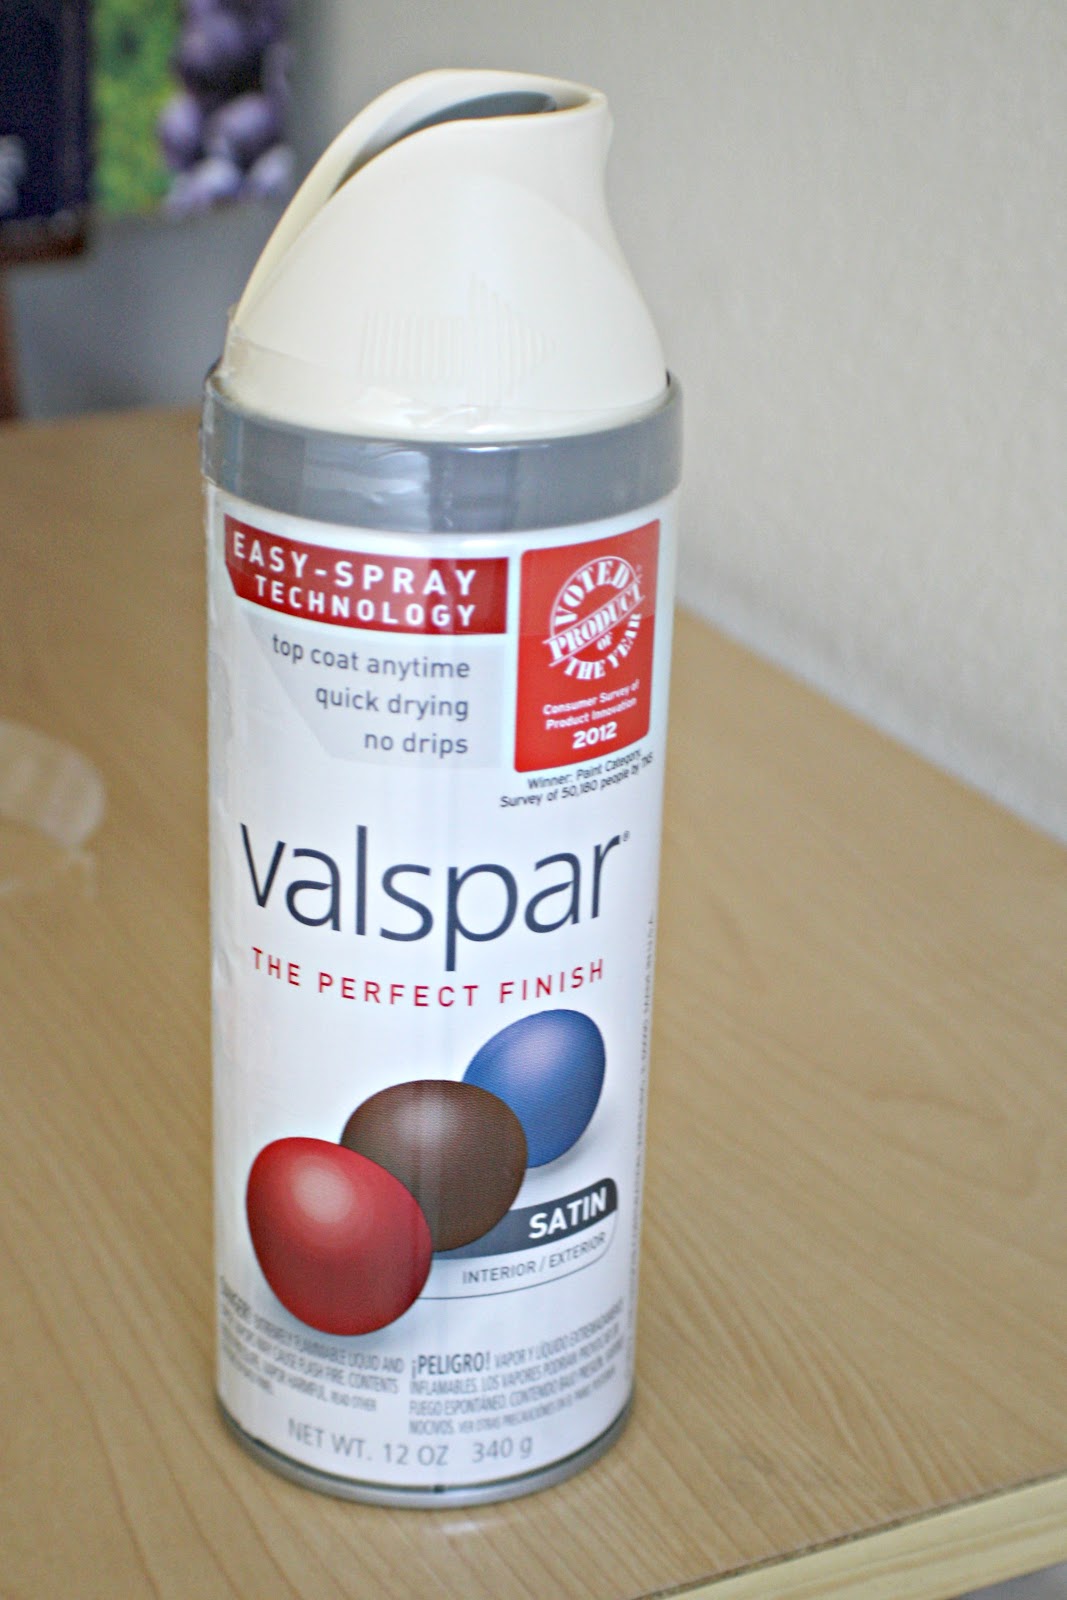
I headed out and bought some off-white spray paint and spent {what felt like} 3 or 4 hours browsing fabric at the craft store.  

I finally decided on this.


Love it.  

So I, by no means, am an expert on re-upholstery.  

I honestly was winging it on this project.  I've seen it done a few times and I figured it couldn't be too hard.

And it wasn't.

So, if you're a beginner and have some chairs you'd like to makeover...

Please don't do this...


Do this!


So, here we go.  Flip it on over and look for the screws that are attaching the seat to the chair.


Take it from me, put the screws in a baggy and label them.

If you don't get around to finishing this project {and you're anything like me} I guarantee that in a few weeks you will be straightening up and ask yourself, "I wonder what these screws go to..."


So here is what you'll need:

Fabric, I was able to do both chairs with 1 yard.
A heavy duty staple gun, {about $20 everywhere we found one.}
1/2" foam and 1/2" batting.
*not shown, a pair of needle-nose pliers.

Here is our awesome spray paint booth that Brian built for me.

This picture is deceiving,
this is in our garage, not our house!
But nice dry wall and molding for
a garage, right?

I haven't found a favorite spray paint brand,
{I tend to just pick by color}
but this fancy nozzle they've got going
actually did keep my trigger finger
from cramping, {no joke.}


I definitely think the white is a huge improvement to the lovely bamboo.

Now we just had to tackle the faded yellow vinyl...


It might take some work, these chairs had a bagillion, but pull all of the staples out.  

Supervisor.

Keeping the base, I put the foam on first.  Just lucked out that it was pre-cut to the perfect size, {livin' right bonus.}


Next, I wrapped the batting around the foam and stapled it to the bottom of the base.


Theeeeen, the foam that was already under the lovely faded yellow vinyl was still in pretty good shape, and since it was already fitted to the base, {and covered the sharp corners,} I decided to keep it.  

So, I put that on top of the first layer of batting.


And then added a second layer of batting.  These are comfy chairs, y'all.


Now, I can't believe I didn't take any more pictures between this stage and the finished product, but...well, I didn't.

The next step is to pull the fabric tightly around and secure it with staples, just as you did the batting.

I always hear and read that you should be sure to pull the fabric really tight.  But I found that I ended up with an uneven edge, sort of smooshing down the batting too much.  

So, I kind of hate to say this, but eyeball it.

Pull it tight, but not too tight...

Then plop it back down on the chair and put the screws {that you know the exact location of} back in.

And...drumroll please...

Oooooh.  Aaaaaah.
Love it.


So, while I was really sad to see the faded yellow vinyl go, I love my new chairs!  

And, I love that my feminine desk and Brian's masculine desk have matching chairs.

More on our office later, we're not ready for a full tour just yet, but we are well on our way! 

Until then...


Damn, I love before-and-after pictures.


Tuesday, July 10

Young House Love Love

Y'all know I love me some Young House Love.

John & Sherry {they have no idea who I am, but we're on a first name basis} are a huge inspiration to us folks in the blogging world.  Honestly, theirs was the first blog I really ever heard about.

My sister, Burton, asked me if I'd heard about it, which I had not, and she explained to me that they had started a blog about their DIY adventures with their house and had then been able to quit their jobs.

"Wait...what?" was my response, if I remember correctly.

I think that that probably is when the seed for this blog was planted.  

If I've learned anything about blogging over the last couple of years, it's that we have stumbled upon something really amazing here.  

No matter what you're interested in, there's a community of people waiting for you out there who are interested in the same thing.  I've only scratched the surface of this community...but I've loved every minute of it.  

But, I digress.

The first post that I read on Young House Love was Wedding Week III: Love, The Perfect Accessory.

In it, they post pictures of a project Sherry made for John to commemorate all of the places that they had lived since they started dating.


I love this idea so much.  

As soon as Brian & I signed the lease on our place this idea popped into my head.

I made a few changes, though.


I. love. this.

I bought the plaques at the craft store for around $2/each.  Painted them...actually used Elmer's Glue to attach the keys...some scrap book paper & a couple of hooks later...et voila.  

I had these babies made before we moved, so they were the first things to be hung when we finally got into our place.

I put them between our doors...


So, this is our foyer, {duhr}  

It is all that exists of the first floor, {except for the garage,} of our sweet little condo.


So, I'm using this opportunity to throw this out as my "before" of our foyer.

As of yet, I have no ideas for it, except for maybe some sort of dog station for Atticus...

But, until then, I love my key project.

I love you, too, John & Sherry...thanks for everything.


Sunday, July 8

The Pinterest Challenge : DIY Crate Ottoman

The Pinterest Challenge is a really fun idea that encourages people to stop pinning and actually start doing!

You all know that I love Pinterest, {you can follow my boards here,} but it is so tempting to just fill up your time with looking at all of the amazing things that other people do...

but then what?

So, when I found this challenge I was so excited because I have probably a bagillion, {you heard me,} projects that I have found on Pinterest that I would love to create...but haven't yet.

Especially this little gem:


DIY Vintage Chic turned crates into a coffee table, which I thought was awesome.

But I already have a coffee table. Know what I don't have?

An ottoman.

Know what I did have?

A crate from my crafts store that needed re-purposing.

SO, The Pinterest Challenge got me up off of my bottom and back to the crafts store to get some more crates.

Et voila!


This project was SO quick & SO rewarding! I LOVE LOVE LOVE my new ottoman!


Crates.

Easiest way to get some nails in there.

See the nails?

Boom.

I found this Euro Pillow at Homegoods.
{One of the best things about our new house:
it's right next to Homegoods.
One of the worst things about our new house:
it's right next to Homegoods.}

The ties on the Euro Sham were a lucky break...
I was able to tie them around the crates so that the pillow
won't shift around.

Boom.

Why, hello. Would you like to sit?
Would you like some reading material? Right here in my ottoman.
Go ahead, put your feet up.

So, there you have it!

I seriously love my new ottoman.

BIG thanks to The Pinterest Challenge & to DIY Vintage Chic for this awesome idea.

Stay tuned for information about how you can VOTE for my ottoman in the challenge!

Until then.


I'm Topsy Turvy

Monday, March 26

From Start to Finish.

So, I'm sorry this took so long for me to get posted!

Brian and I just got back from a trip to Orlando for the PGA golf tournament at Bay Hill.  

(We went to Ikea on Sunday.  I'd never been, that place is insane.  But I got a few exciting things for the apartment that I can't wait to show you!)

But first, here was the dresser before I began.


Annie, Scout and Atticus (aka The Blonde Dog Brigade)
were very excited about this makeover.

As I mentioned last time, this dresser was always in my brother's room when we were growing up, and then it came out of storage and with me to my apartment.

It's been in my parents' garage ever since I moved back, waiting for this makeover!

So, first I removed all the hardware.


Hanging on to these bad boys, surely to come up
with a handy use for them.

Then, I sanded all of the drawer fronts.  As I had plans to stain them, I needed to sand them all the way down, (as opposed to just scuffing them up, as you would if you were painting them.)


I decided to then use this Minwax pre-stain wood conditioner.  

Under my dad's advisement, actually, I decided to use the pre-stain because the wood is light and soft and the conditioner helps the stain go on evenly.


The pre-stain goes on really easily.  I used a synthetic brush and allowed the conditioner to sit for 15 minutes before wiping off the excess.

Once you've applied the pre-stain, you have to stain the wood within two hours.

It's hard to tell the difference here, but these were the three stains I tried.


I've used Special Walnut before.  (I used it here, on the breakfast chair that my grandmother gave me and that  I refinished...)

This time around I just liked the red that was in the Rich Mahagony Mahogany, (I just realized I misspelled mahogany in the picture...doh!)  and in the blend, but I liked that the Rich Mahogany was darker.

Thus, I chose it...

Seems like that was a long explanation.


Super-effective gloves


I love these gel stains, they go on really smoothly! 

I used cheese cloth, the directions on the can say that you can use a brush but I really think that it is easier to use a clean cloth...just rub the stain in until the wood is evenly coated and there is no excess stain left on the surface.

Once it is dry, (I waited over night for good measure,) apply a protective topcoat.  


I chose a semi-gloss, actually my dad had this in his shop so it's what I used, but I just knew that I didn't want anything super glossy, so it worked out well.

Avoid shaking the polyurethane, it bubbles easily.  Stir it slowly and strain it into a small cup or can that you can easily use.  

This makes a quick application easier, which is helpful because it does tend to dry pretty quickly and you don't want any nasty brush strokes on the surface!


My pictures jump a bit here, but the pictures of me painting the base of the dresser are pretty boring.

I used an off-white paint that we had left over from the trim in my parents' living room, (cha-ching.)


Ta-da.  

Now, on to my favorite part...

the hardware.

I am obsessed with drawer pulls and handles, etc. 

As you can plainly see...


My hardware collection (and one of my Dad's beautiful bowls.)
I've collected quite a few.

I found the blue and white ones at World Market, (for 4 bucks!) and the green I stumbled upon one day at JoAnn's 75% off!

I've been waiting to find a good spot for the green, so I decided to mix them in to drawer pulls for this dresser, (I have a few left and am planning on using them for my next project...)


I'll have to find a better picture of the drawer pulls.  But you can take my word for it, they look awesome.

I'm really happy with the way that this turned out, and I CANNOT wait to get it into my apartment!  

Now, I have a dad who has endless supplies in his shop, but all in all I think I spent less than $20 on this makeover...

Even if you didn't have a dad that's as awesome as mine is, though...I'm confident that you could knock this bad boy out for very little.  

I started work today on transforming an old, (very old) bookshelf into a small island for my kitchen.  

The projects I have on my list are endless and awesome...I can't wait.


But until then, one more time for the cheap seats...


ahh...