Showing posts with label decorating. Show all posts

Thursday, September 6

Vanity to Desk Makeover

So, I've been teasing y'all with this project for months now, but that's how long I have been waiting to get it done!  It ended up being way easier than I thought it was going to be.

This is the vanity that I started with.


It belonged to my godmother, Stephanie.

Stephanie was the ultimate Southern lady.  She didn't write the book on etiquette, but she could have.  She certainly knew it by heart.  

The woman who had everything, from jewelry to a set of china for every season, she was every little girl's dream.  A true fairy godmother.  

Because of Stephanie, I have beautiful pearls, Christmas china & {also thanks to my other dear godmother, Sally} a beautiful set of fine silverware. 

But, more than this, I was blessed by her amazing spirit...she was never without a smile on her face or a kind word to say.  

Stephanie passed away this year after a short battle with cancer.  I miss her every day.  

She gave me this vanity along with a beautiful antique dresser.  I don't have room for the dresser right now, but I love the vanity.  

But I decided one day that it would get a lot more use as a desk than as a vanity.  

And after considering just removing the mirror altogether, I decided that this would be more creative and much more useful!

First, I very carefully removed the backing from the mirror which was just tacked on with small finishing nails.  


I put the mirror aside, I'm not sure yet if I will hang on to it or not.

Next, I purchased a small roll of cork board from the craft store for $10.

Using the mirror as a guide, I cut a piece of cork board out and glued it to the inside of the backing.

I then stapled batting around the backing and then...the peacock fabric!


That's right, my favorite Thanksgiving in Summer themed fabric that I showed you here!

And...

Voila!

my new desk!

I love, love, love it!

And now I have a cute cork board right there for notes, ideas, pictures, etc.


These are my sweet fabric pinwheel push pins from Anthropologie that I love.


See how nice and organized it looks?

It's not.  Those drawers are full of junk.  Each one of them.  

It will definitely be an Organizational Wednesday project.

But isn't it pretty?

I just love it!


So, I love my little corner of our office.

I obviously still have a lot of work to do in there before I give you a full tour, but again, we're getting closer!

Until then, here's to you, Steph.  I hope you like it.


Saturday, August 25

Easy Chair Makeover {and another before-and-after picture!}

Hi, everybody!

Well, I have had a glimpse this week of what motherhood might be like for me.  

Atticus got sick again twice this week.  We took her to the vet today and they are treating her with probiotics and antihistamines, in case she is allergic to something.  But they say her behavior appears to be epileptic.  Oye.

So, we are hoping that it is just a GI issue and that we can find the trigger!  

But I have, shall we say, not been handling it well.  I really don't know how I am going to handle it when my babies get sick or hurt.  I'm banking on the fact that my maternal instincts will make me stronger.

Here's hoping.

But on another note...

I wanted to share with you a fun project I finished last week!

I actually "rescued" these chairs from an old building at my church before it was torn down last year.


When Brian and I decided to make the second bedroom an office, I liked the idea of making it a couple's office.  

Two desks, one "male" and one "female," but I thought it would be cute if we had matching chairs.

So, I thought of these poor little abandoned and abused chairs.

I headed out and bought some off-white spray paint and spent {what felt like} 3 or 4 hours browsing fabric at the craft store.  

I finally decided on this.


Love it.  

So I, by no means, am an expert on re-upholstery.  

I honestly was winging it on this project.  I've seen it done a few times and I figured it couldn't be too hard.

And it wasn't.

So, if you're a beginner and have some chairs you'd like to makeover...

Please don't do this...


Do this!


So, here we go.  Flip it on over and look for the screws that are attaching the seat to the chair.


Take it from me, put the screws in a baggy and label them.

If you don't get around to finishing this project {and you're anything like me} I guarantee that in a few weeks you will be straightening up and ask yourself, "I wonder what these screws go to..."


So here is what you'll need:

Fabric, I was able to do both chairs with 1 yard.
A heavy duty staple gun, {about $20 everywhere we found one.}
1/2" foam and 1/2" batting.
*not shown, a pair of needle-nose pliers.

Here is our awesome spray paint booth that Brian built for me.

This picture is deceiving,
this is in our garage, not our house!
But nice dry wall and molding for
a garage, right?

I haven't found a favorite spray paint brand,
{I tend to just pick by color}
but this fancy nozzle they've got going
actually did keep my trigger finger
from cramping, {no joke.}


I definitely think the white is a huge improvement to the lovely bamboo.

Now we just had to tackle the faded yellow vinyl...


It might take some work, these chairs had a bagillion, but pull all of the staples out.  

Supervisor.

Keeping the base, I put the foam on first.  Just lucked out that it was pre-cut to the perfect size, {livin' right bonus.}


Next, I wrapped the batting around the foam and stapled it to the bottom of the base.


Theeeeen, the foam that was already under the lovely faded yellow vinyl was still in pretty good shape, and since it was already fitted to the base, {and covered the sharp corners,} I decided to keep it.  

So, I put that on top of the first layer of batting.


And then added a second layer of batting.  These are comfy chairs, y'all.


Now, I can't believe I didn't take any more pictures between this stage and the finished product, but...well, I didn't.

The next step is to pull the fabric tightly around and secure it with staples, just as you did the batting.

I always hear and read that you should be sure to pull the fabric really tight.  But I found that I ended up with an uneven edge, sort of smooshing down the batting too much.  

So, I kind of hate to say this, but eyeball it.

Pull it tight, but not too tight...

Then plop it back down on the chair and put the screws {that you know the exact location of} back in.

And...drumroll please...

Oooooh.  Aaaaaah.
Love it.


So, while I was really sad to see the faded yellow vinyl go, I love my new chairs!  

And, I love that my feminine desk and Brian's masculine desk have matching chairs.

More on our office later, we're not ready for a full tour just yet, but we are well on our way! 

Until then...


Damn, I love before-and-after pictures.


Wednesday, August 1

Ikea-mazing.

So, I finally got around to hanging some art on our walls last night.

I have been such a weenie about it, not wanting to make any decisions about where things will go.

But after our epic trip to Ikea this weekend, our living room has really started to take shape so I decided that it was time.

Also, my prize from winning The Pinterest Challenge, {you can see my guest post over there, here} came in the mail yesterday and I immediately found a spot for it and hung it up.

That really got the ole creative juices flowing and I knocked out another wall, too.  {figuratively.}

But, first things first.  Ikea.

Brian used to live in Orlando so he is no stranger to Ikea.  {Anywhere that serves free breakfast on a daily basis is going to find a loyal customer in Brian.}

I, on the other hand, had never been before I met Brian.

The first time we went was more for the experience than anything else as we both still lived at home.

For a DIY decorator that place is seriously overwhelming.  Sensory overload.

Especially without a list...just wandering around, looking at everything.  I found it exhausting.

This time, though, we had a budget{ish} and a list of things that we have been waiting to buy for the new place.

FUN.


happiness is.


We made it out of there just in time because we didn't have any more space in our car or our budget.

Then, when we got home, this was waiting for me...


Home is Where the Heart is

Michelle from Girl in Air was the guest blogger last month on The Pinterest Challenge.

Which means my prize for winning was a gift certificate to her Etsy shop!

So, we bought the Expedit TV Unit at Ikea.


Brian is going to mount the TV on the back panel & I am looking for a small ficus tree with a braided trunk to put to the right of the unit.

So, like I said, this got my creative juices flowin'.  I hung my Home is Where the Heart is map at the top of our stairs.


I love this so much.  Brian has always loved the American Flag that's in all the Pottery Barn catalogs & this reminds us of that.


Atticus loves it, too.

The other piece is an original Tres Taylor,  {I talked about it here,} & it is one of my favorite things.

Here's what I did on the opposite wall.


I got that mirror at Target a few years ago on sale for about $12.  

I painted that bookshelf with plans to turn it into a kitchen island, but it wouldn't really fit in our kitchen, so it's going to stay a bookshelf for little while longer.  I really like it here, though.  

I haven't really decided on the decor for the lower shelves but I love the tray on top as a catch-all.  


Print I picked up while I was in
the Bahamas last summer.

My grandparents on their wedding day.


So, I think that things are really starting to come together!

I'm working on a gallery wall in the hallway now, making over some chairs in our office, painting our chandelier & a really fun vanity-to-desk makeover...

Until then, enjoy your Wednesdays!


Monday, July 16

Picture Frame Message Board

Hi, guys!

So, I made this project back in April for Brian's birthday, {it was one of his 25 presents...}

but I never got around to showing it to you!

I, of course, got the idea for this project from Pinterest.  


I, unfortunately, was unable to find the original source of this Pin...  

{if anyone knows, please let me know!}

But I loved it, so I made it for Brian, & now that we actually live in the same space...we get to use it!

Here's how I did it...


Spray painted frame...

Sharpie on construction paper...

Hot-glued a magnetic picture frame to the frame,
{after removing the magnet.}

Anthropologie fabric pinwheel push pin...

Yarn & a dry-erase marker...

Et voila.

Aww.

I promise they're not always that gushy, {although they are a lot...& I love it.}

But we have so much fun with this...

it's such an easy way to break up the every day blah with something to make you smile & maybe swoon a little bit.

So, here's hoping that you have a little bit of swoon in your day tomorrow.

Until then.

Friday, July 13

DIY Headboard Ideas

So, I spent most of this morning scouring the internet for headboard ideas.

We have done very little to our bedroom.  The dresser that I made over {& love} is in there.

And one of the best things about moving in with Brian is that he came with a Tempurpedic bed {"The 'Pedic"}  but, it is just on a bed frame.

So, I really don't want to do too much decorating in there until I figure out the headboard.

I fell in love with this bedding from West Elm...

Psssst...ALL bedding at West Elm is 20% right now!

& sweet Brian bought it for me.  

So, as you can see, I have a pretty neutral palette to work with.  But I think that's a good thing.

I am having so much trouble narrowing down the ideas in my head for a headboard, though.

This is why...


So, I could go a simple route and do a traditional upholstered headboard with a really pretty fabric.

{Although I can't imagine how I'll narrow down the fabric choices...}


This first one comes from Apartment Therapy.
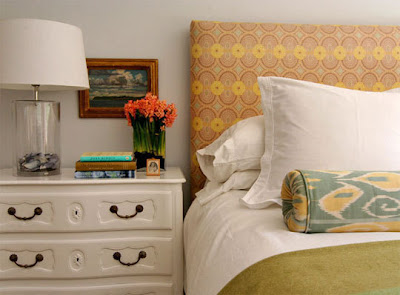
I love the bold print with the neutral bedding.

This one looks more complicated,
but I love the shape & large print patter.
Another from BHG...
I love this for the understated headboard
against a large, accent wall.
Renting isn't ideal for accent walls, though...
but this one is getting filed away.

This is from a collection of headboards on Picklee.com.  
Again, I love the intricate design and bold color,
but I'm not sure this concept would go well
with the feel of our bedding.

This one is from Une Petite Chouette.
How fun is this?
Our bed isn't in the corner of the room,
but I LOVE this idea.


Or, I've always really liked the idea of a bookcase as a headboard.  It's different {a little Ikea} but adds a lot of potential for decor & also storage, {big +.}


Another one from Apartment Therapy...
I love this idea &, if you can find the right bookcase, very little work.

& another from Better Homes & Garden...
I think that this is so fun.  I love the assymetrical shape
the design creates & I love the added cabinet doors.
This one also seems a bit much for a rental, but it's definitely
an idea that I'm thinking about...


OR, a really great DIY route is to hang frames behind the bed to act as the headboard.  A little less work & a lot of impact.


& another from BHG.com...you know I love BHG, right?
I love this idea of framing fabric behind the bed.


This one is from 1 kind design...
I also like the large scale frames...


I found this on Belle Maison, but I think it originally was on BHG.com.
I really, really like this one.
Handkerchiefs {or maybe just scrapbook paper} in inexpensive frames.
Definitely at the top of the list.


Another from Une Petite Chouette.
Shouldn't be a surprise to anybody that I
LOVE. THIS.
& I have all of that leftover chalkboard paint...

But, then, there are some funkier options.

I found this one on Beautiful Inspirations.
I think that this is so beautiful, and it definitely would be something
I'd consider, but I feel like it's the kind of thing you have to
stumble on...
but I love the idea of using something found.


And another from Apartment Therapy.
How pretty???
I think that this is probably a bit over the top,
even for me, but I think that this is so sweet
& romantic & just...pretty.
maybe in a child's room one day.

I found this one on a website called Sunset.
Another idea for a found or rescued object is to use a mantel.
Very cool & so much potential.


This is from a collection on HGTV.com, a tutorial by Ana White, {Ana-White.com}
This one would be pretty simple to make, and I love the horizontal
planks inside the frame.  Great, bold color, too.

From Design*Sponge, a tutorial by Sarah Torrence of 508 Restoration & Design
This is one of my favorites.
I love the barnwood, I love the random positioning of the
the boards but also the clean outline.
But I LOVE the Awake my Soul.
 I love it.


From Stylizimo
Simple pallets.  Big impact.
I love how rustic it is.


And from House Tweaking...
Probably my all time favorite.  If you haven't
seen this blog, you must.


So, seriously.  I don't know how I will ever decide.

I think I'm leaning towards something with frames.  Seems to be the best option for renters...

But, oh, the reclaimed wood...

The chalkboard...

The Awake my Soul...

I just don't know how I'll decide. 

But until then, here's wishing you a bed as comfortable & comforting as mine is.